This is a pattern I drafted for four sizes of a shaped face mask with a filter pocket. My first set of face masks was based on the advice available at the time, and I used a layer of flannel and one of cotton. Data has since become available showing that this is far, far less effective than 2 layers of cotton with a disposable filter layer, so I have streamlined making the filter pockets for this pattern as well. I link to more information about adding a nose wire or choosing a filter on the home page, and I’ll add a tutorial about putting in a permanent nose wire when I get a chance. (There are lots, feel free to google, if you want to add one now- just choose one that puts the wire outside the filter pocket. This pattern will accept the adhesive, disposable nose wire I’m recommending on the home page as written.)
I made 50+ fitted face masks before I designed this pattern. I was using the Craft Passion pattern, which is perfectly fine, but there are a few small things about it that were cumulatively annoying when making a lot of masks, and which I thought were possibly a disservice to beginning sewists.
For a start, the fact that the template doesn’t include seam allowance meant that once I poked too many pinholes in mine, I couldn’t just print a new one. So when I came to the point of needing to re-draft my seam allowance and elastic pocket, I decided it was just as easy to draft a new pattern from scratch, which made joining the pieces easier and faster as well. Also, I noticed that although I like the close to the face fit, it was getting damp very quickly from being so close to my mouth, so I adjusted the curve to allow just enough more space over the mouth to avoid that.
Please consider yourself a beta tester for this pattern. I have tested all four sizes of the pattern by making multiple prototypes, so I know the pieces themselves work properly. What I cannot test without help is how easy it is to follow my directions! So if you run across something confusing, please come back and let me know in the comments or by using my contact me page. Thank you so much!!
Also, I’ve tried to write without assuming a high degree of background sewing knowledge, because I know a lot of people are taking this on as a project when they have never sewed before, in an effort to keep their loved ones safe. If there are places where I’ve inadvertently left a gap in the instructions, I’d love feedback on that as well.
Because children adopt new skills through play and because I adore cute things, and because I have so very many scraps from this process, I have included a “stuffie” size. It fits approximately a build a bear size animal or an American Girl- size doll. Possibly not well, but since they don’t breathe we can be a little flexible on fit.
Download and print the pattern: (some files are coming soon)
- Size Stuffie (approximately a build a bear size toy)
- Youth Size Small (approximately kids age 3-6)
- Youth Size Medium (approximately kids age 7-12)
- Adult Size L (approximately women and teenagers)
- Adult Size XL (approximately men)
- Filter Cutting Templates
I am working on another Adult size meant to accommodate a beard- I need people who are willing to fit test some prototypes and I am lacking beardy people in here to try it on, so let me know if you’d like a prototype or two.
Materials
You will need high quality quilters cotton in two colors or two patterns. This is so you can tell the inside from the outside, and also because mixing patterns is fun. (You can obviously do one pattern and one solid if you prefer.) A fat quarter of each is enough to get started- I can usually get 3 or 4 masks out of two fat quarters, but it depends on size and whether your print is directional. (More on that during construction.)
1/4″ inch elastic: You will need a 26″ piece for each stuffie size mask, a 32″ for each mask size S, M, or L and a 36″ piece for each XL. I find this kind easiest to work with and least irritating to the skin, but I think other kinds may hold up better to repeated washing, so choose according to your needs.
Matching thread: I use white for light backgrounds and black for dark backgrounds, but you can absolutely choose differently. I’m not the thread boss.
Filter layer: I am currently recommending cutting filters from filti cloth, based on the data available here. I’m sure as time goes on, better and more affordable filter materials will become available, and you should choose what best meets your needs based on current information.
Prep
Print the pattern in the size you need twice for each mask you wish to make. Cut out the paper pattern at the “outside” line for the outside of the mask, and at the “inside” line for the inside of the masks.
Prewash your fabrics. I use hot water and dry on high to make sure I minimize any shrinkage post construction. You should also iron or steam your fabric to remove wrinkles before cutting, unless your dryer is better at not creating creased messes than mine.
Wind at least 2 bobbins in your thread color. Nothing is more annoying than having to stop and wind bobbins half a seam from done.
Construction
Fold your fabric, right sides (this means the pretty side, not the opposite of left) together and with the top of your print at the top of your work space. (Many patterns are symmetrical so there isn’t a “top.” But if your pattern has one, you need to pay attention unless you want to wonder why all the cats are looking at you upside down. Don’t lay out for cutting before coffee. Trust me on this.)
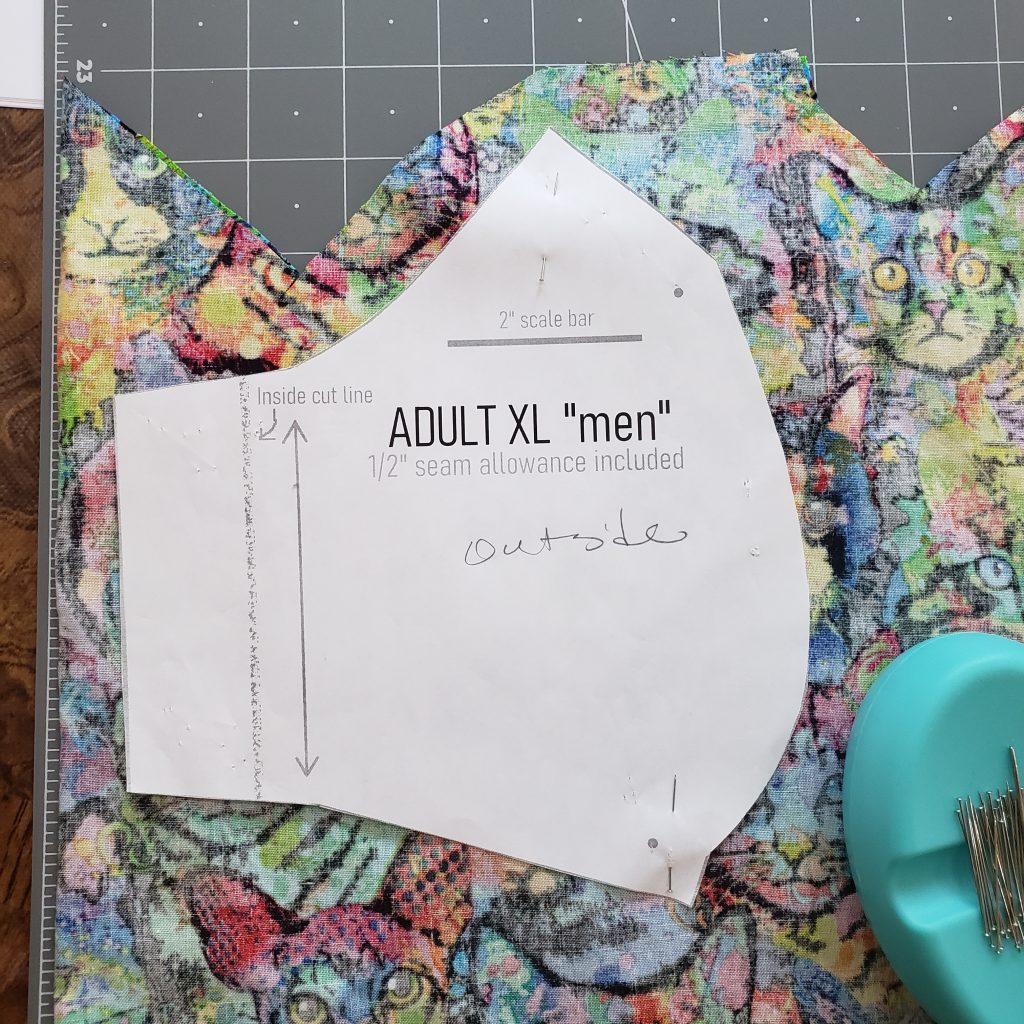
Pin your pattern pieces with the arrows running along the vertical grain of the fabric, and cut out enough outsides from your outside fabric and enough insides from your inside fabric for the number of masks you are making today. Cut carefully around each piece. Not so carefully it takes all day, just carefully enough that you don’t accidentally lop any corners off your paper pattern.
I have included dots at the points where you’ll pivot with the needle down. You may not need these dots, lots of people can eyeball a pivot that comes at a corner in the pattern like this, but if you feel better seeing the dot while you are sewing, you should mark them on the wrong (not pretty) side of the piece you’ll see while you are feeding the fabric under the needle of the sewing machine.
With the right (pretty) sides together, pin your inside pieces and your outside pieces along the front curve. Or don’t pin them- quilt cotton is not slippery and these pieces aren’t big enough or heavy enough to pull themselves out of position, so once you put them under the presser foot they should stay. But I’m not the pin boss either, and if you feel good with pins then put pins. Just don’t sew over the pins unless you like replacing your sewing machine needle.
Sew each front curve with a straight stitch and a half inch seam allowance. Stop at each corner (or dot if you marked them) with the needle in the fabric and lift the presser foot, then turn the fabric so the seam allowance lines up to your 1/2″ mark again and proceed to the next turn or the end of the seam.
Do a half inch hem on the outside edge of ONLY the inside pieces you have just seamed. You can use a hot hemmer tool to press the seam allowance over, or you can just use your hem measuring tool, or a regular ruler. I fold the half inch allowance over and then over sew the edge with a big zigzag, but a straight stitch would work too. I think a double fold is too bulky, but if that’s what you’d like, just remember the total allowed for the hem is 1/2″, so you should fold over 1/4″ the first time, then fold it again and sew it down.
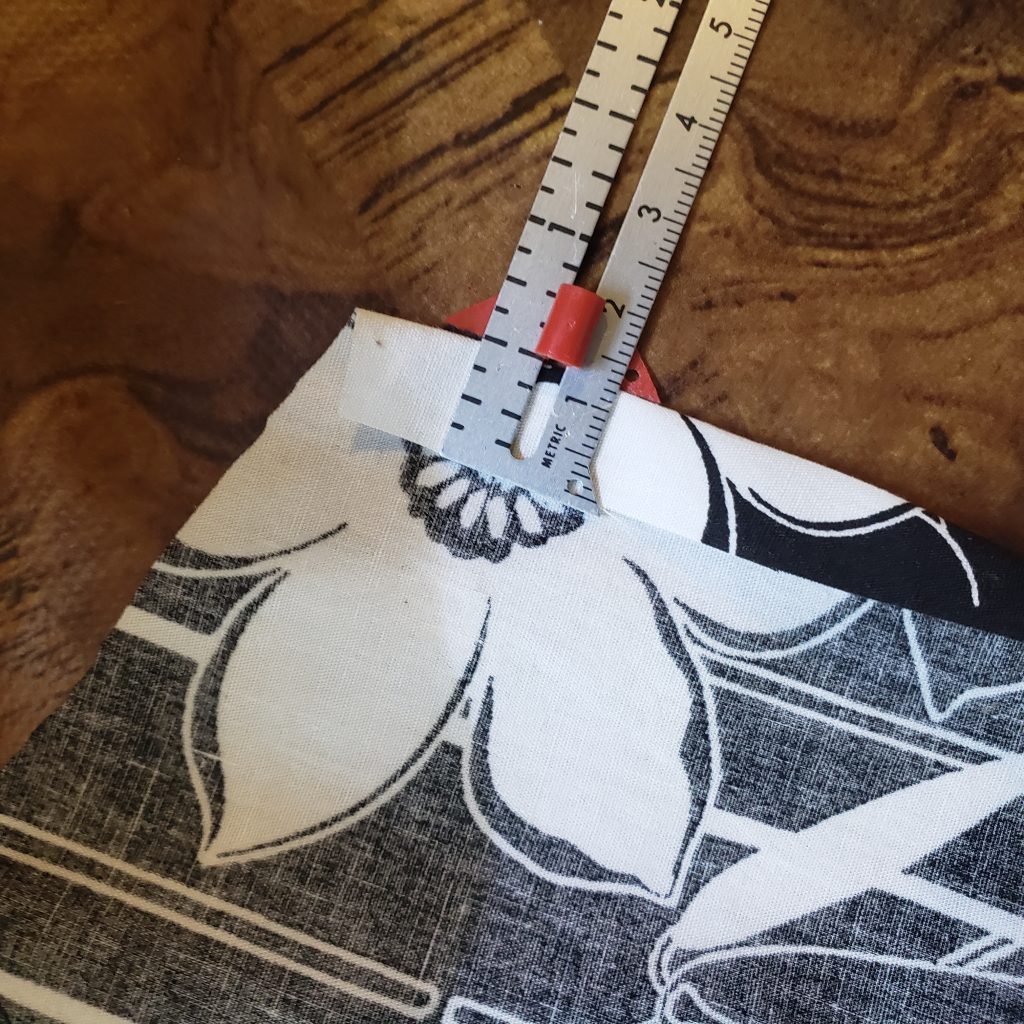
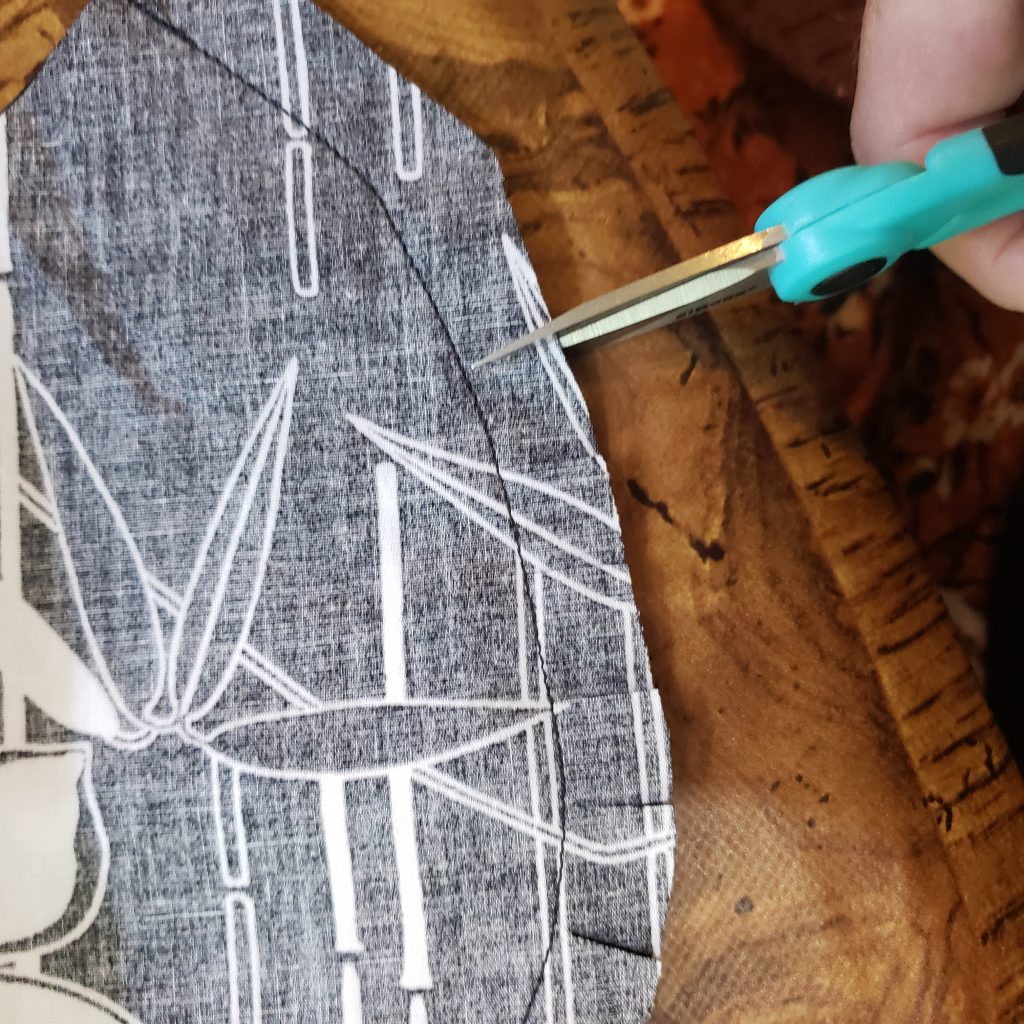
Clip your seams into each corner and along the curves. This keeps them from distorting when you turn them right side out. Press your seams open at the top and bottom. (If you have a tailor’s ham and you love ironing, you can press them open all the way. I don’t.)
Pin the top of the outside and the top of the inside together, with the right sides together. (I do find I need to pin this otherwise the seams may not line up. Again, I’m not the boss, so if you don’t feel you need pins to make this come out nicely, rock on.) Start from the middle, matching the seams, and work your way out.
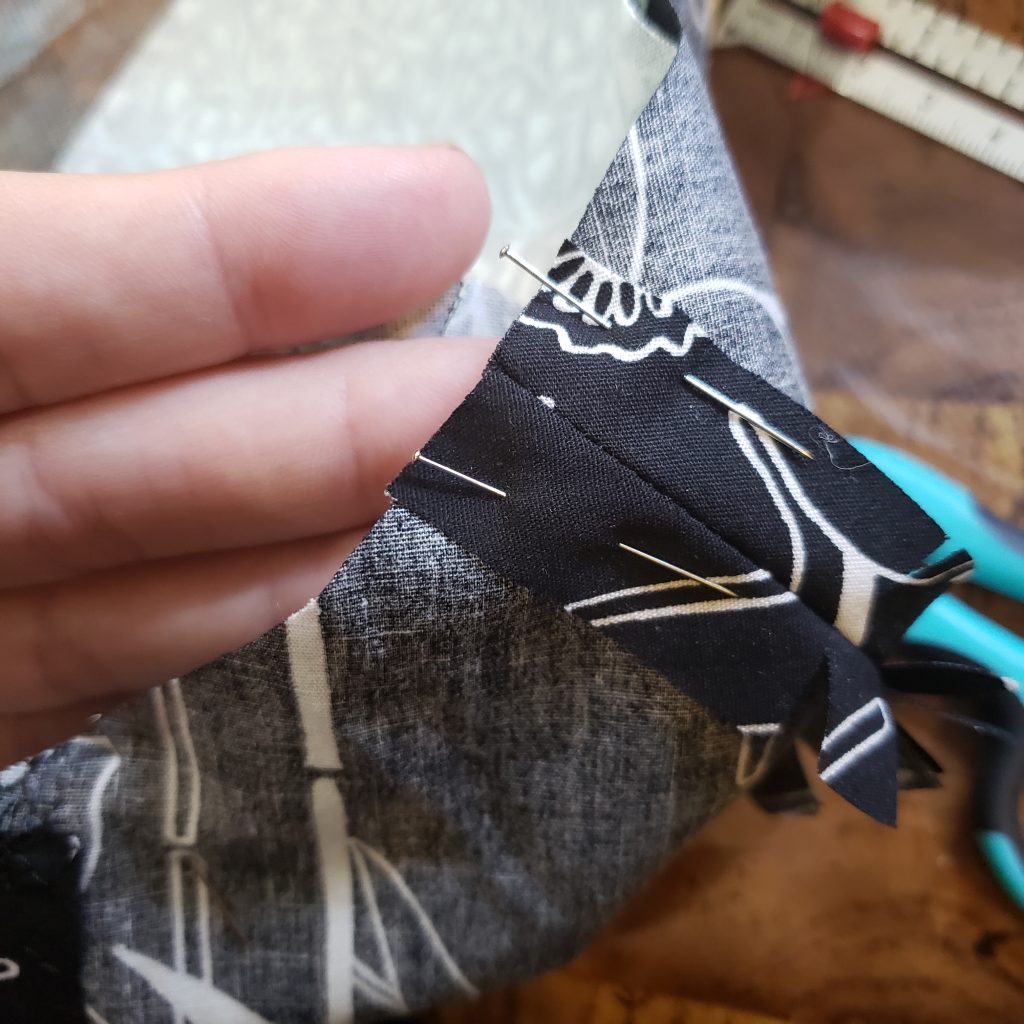
Sew the top seam with 1/2″ seam allowance.
Pin the bottom seam- again start from the middle and work your way out. Sew the bottom seam with 1/2″ seam allowance.
Now we are going to clip and trim the top and bottom seams. I clip into each corner and along the curves, as usual. The top is curved so of course you’d clip there. You’ll want to trim the seam allowance over the joined seams so you’re sewing through less fabric when you top stitch them a little later. That’s also not a surprise.
The bottom seam is straight, though, and often you do not need to clip straight seams- but I have found that in the middle, where the seams join, I need to clip on either side of the stacked seams and then trim that spot closer to the bottom seam so it doesn’t distort the finished mask. This is particularly important on smaller sizes. It’s not as noticeable on a finished size XL mask, but on a size S it is very obvious.
Once that’s done, you are going to reach through each mask and turn it right side out. It will look a bit shapeless, but that’s ok, just go over to the ironing board and press it flat. Make sure you poke the seams all the way out so they are the edges. I have a tube turner with a knob on the end, but you can also use a knitting needle or a wooden skewer or the corner of a ruler or probably a few other things I’ve never thought of. Whatever you’ve got that works is fine.
You’ll now have flat, turned over hems inside each flap on the outside of your mask. Sew these down- I use a straight stitch here but if I were consistent I’d use the same big zigzag I used on the hem. I don’t know why and you should do whatever you like. Be careful not to sew over your filter pocket.
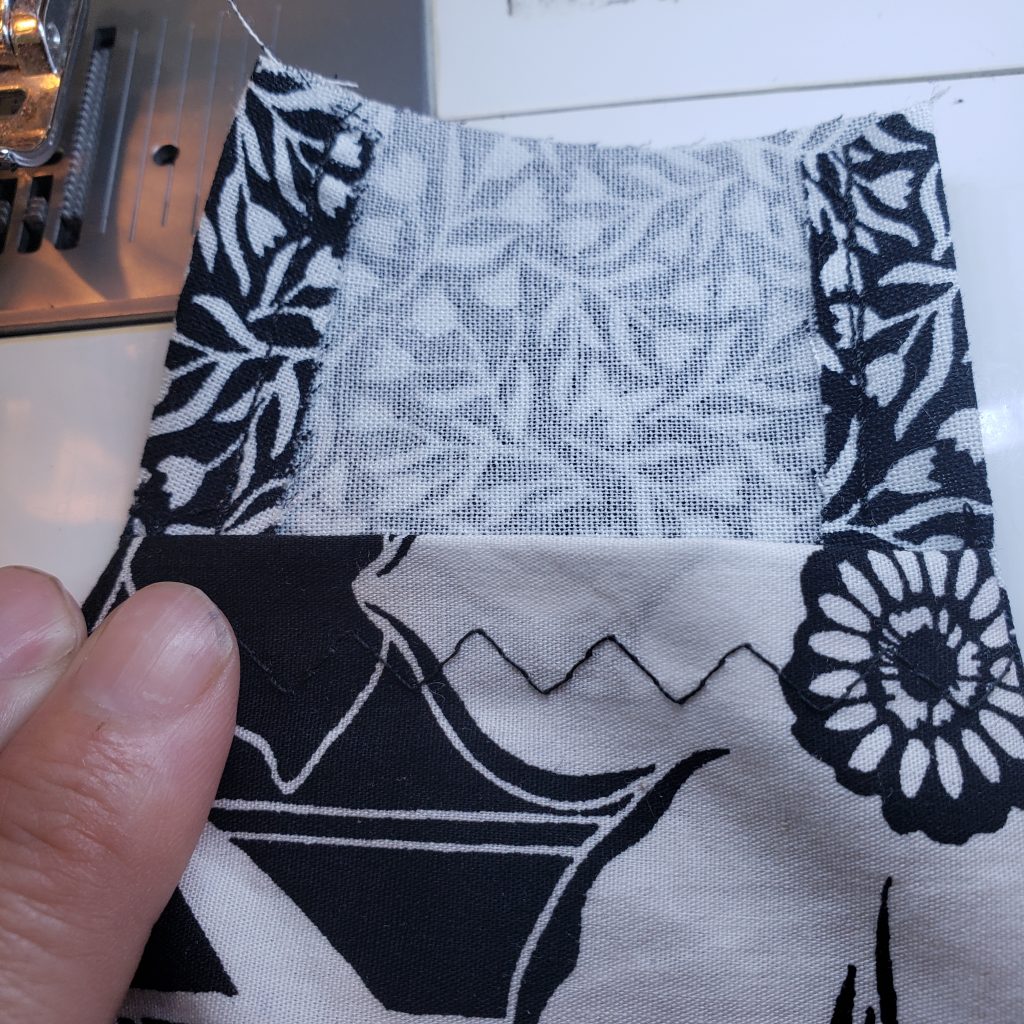
Next we are going to top stitch the top and bottom edges. I adore finishing things, so sometimes I’m feeling a little impatient by this step. But the purpose of the top sitches is to help the mask hold up to lots of washing- and a clean mask is a good mask, so this step isn’t just decorative.
Top stitching is done close to the seam or edge, so you’ll want to move your needle to whatever position is closest to the seam allowance markings. Because we are stitching so close to the edge, there isn’t a guide line on my machine. I use the outside feed dog as a guide. If your feed dogs aren’t visible like this, you can put a piece of tape down to show you where to position your work. Top stitching looks nicer if you make your stitches a little longer than you used for sewing the seams. I usually move mine stitch length knob up by one. (And remind myself sternly to put it back when I’m done topstitching.) Don’t be nervous if you haven’t done this before, just go slow and steady. If it’s a little wobbly no one is going to notice because they are going to be busy wondering where you got that cute mask.
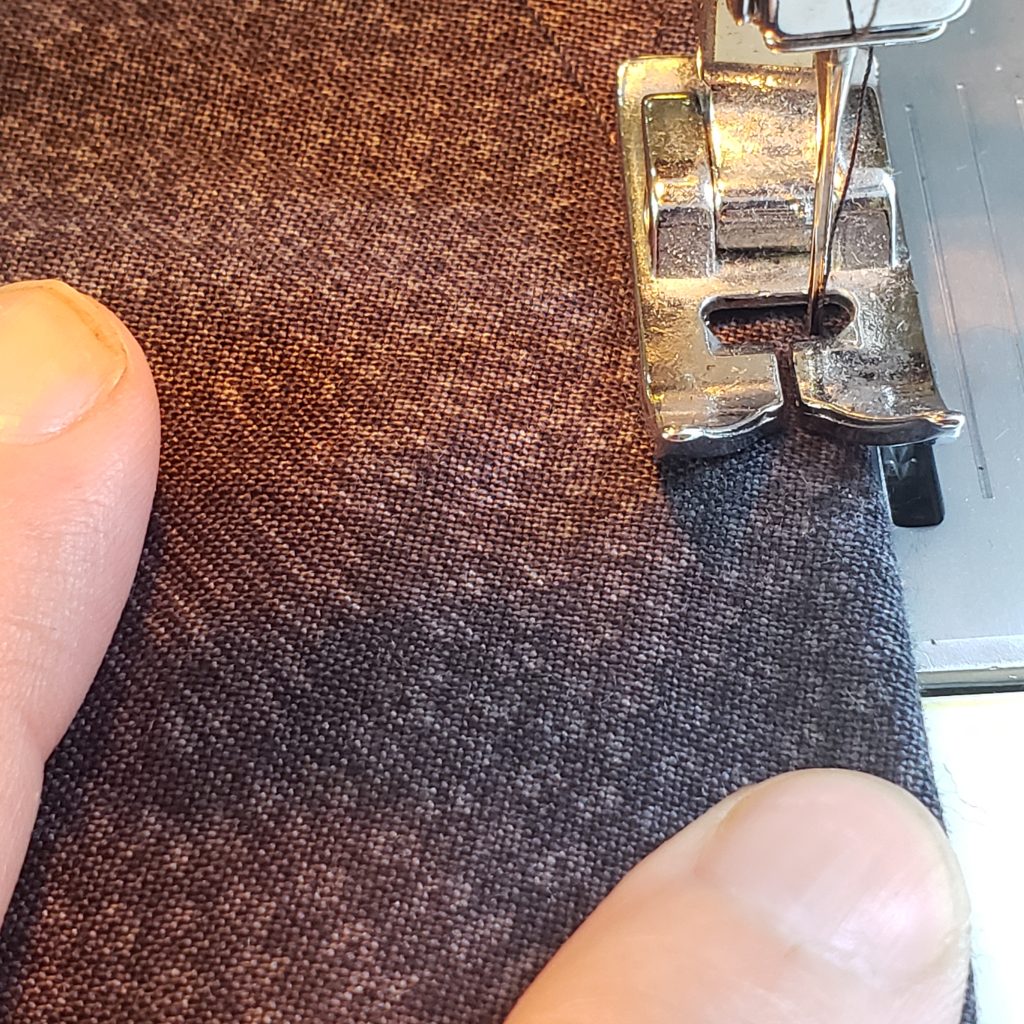
Now it is time to make the sleeves for the elastic. You’re going to fold the cut edge of the flap over 1/4″ and press it.
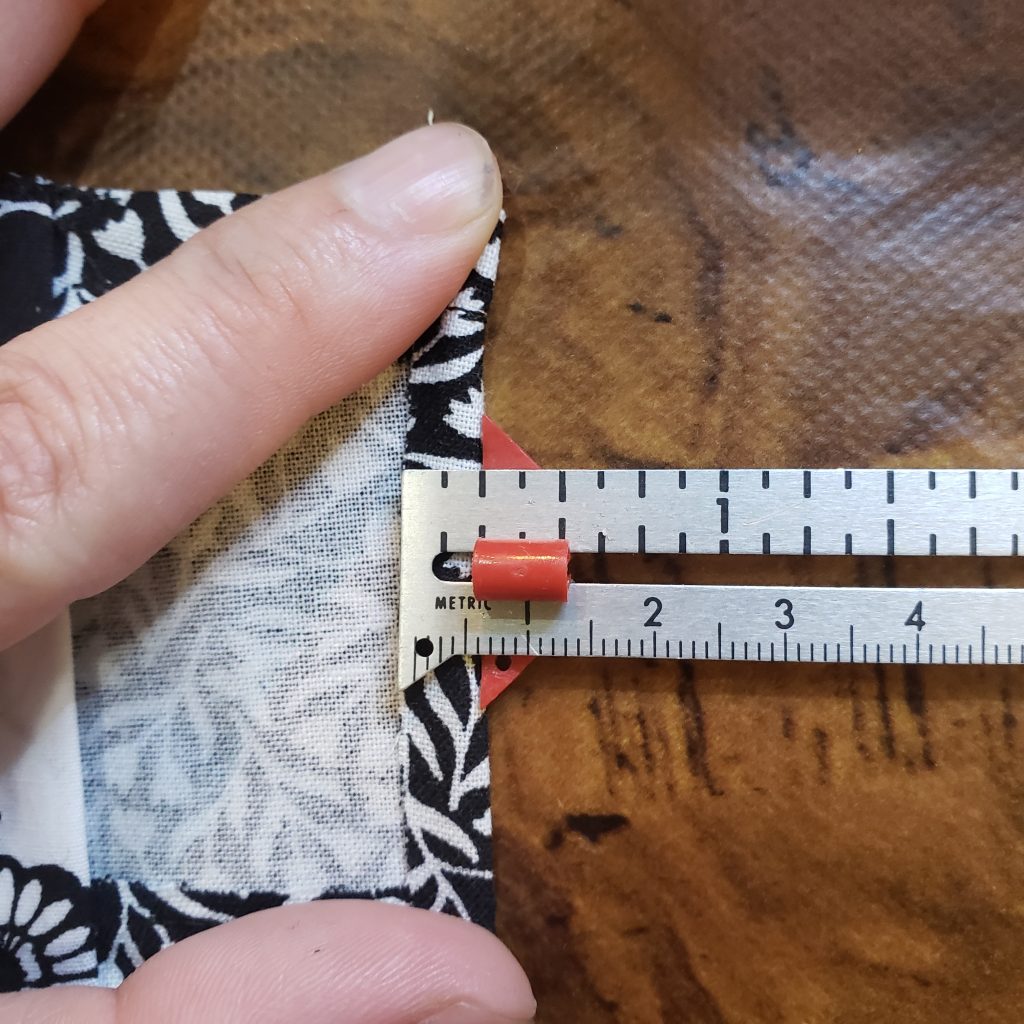
Then fold it over again so it’s right next to the filter pocket hem. (Not to be repetitive, but as long as you’re at the ironing board, press that too.)
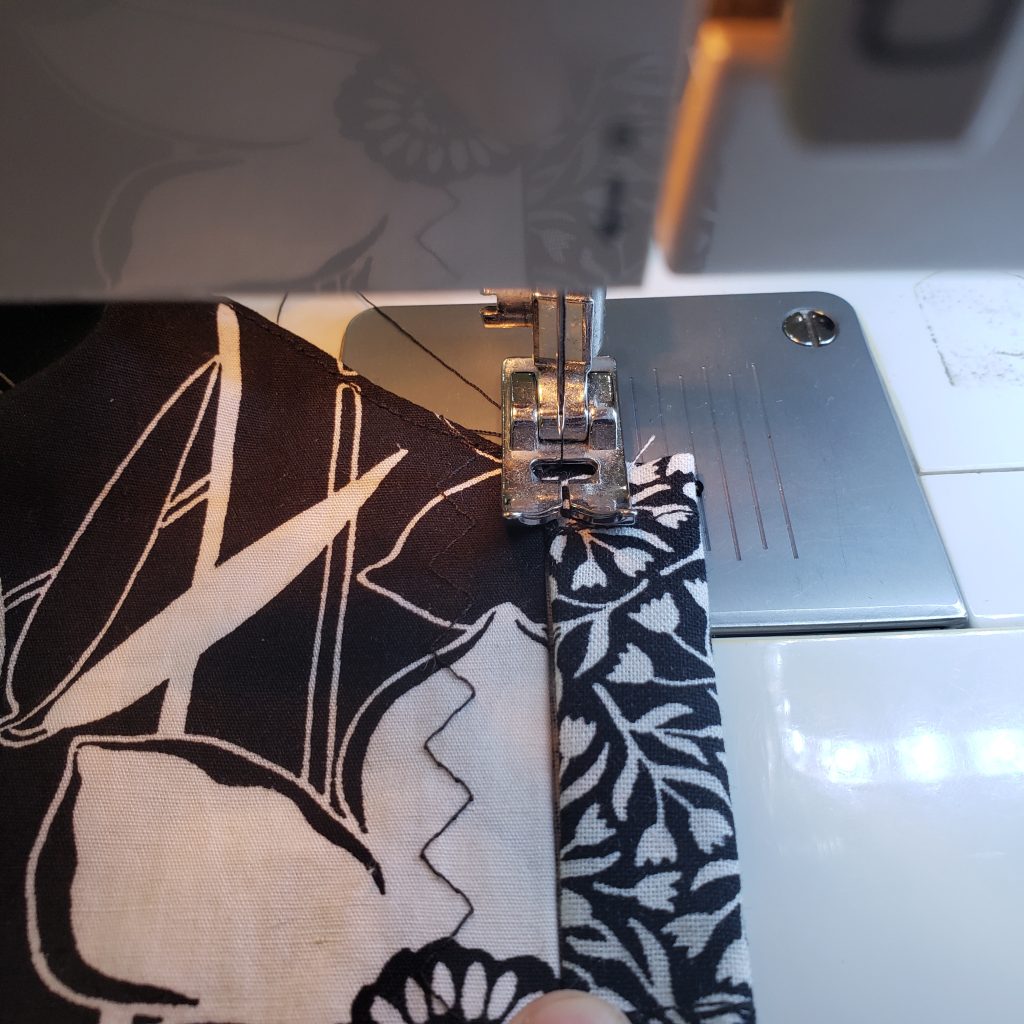
Now you are going to top stitch along the inside of the pocket, about 1/8″ from the folded edge of the flap. Repeat for the other sleeve.
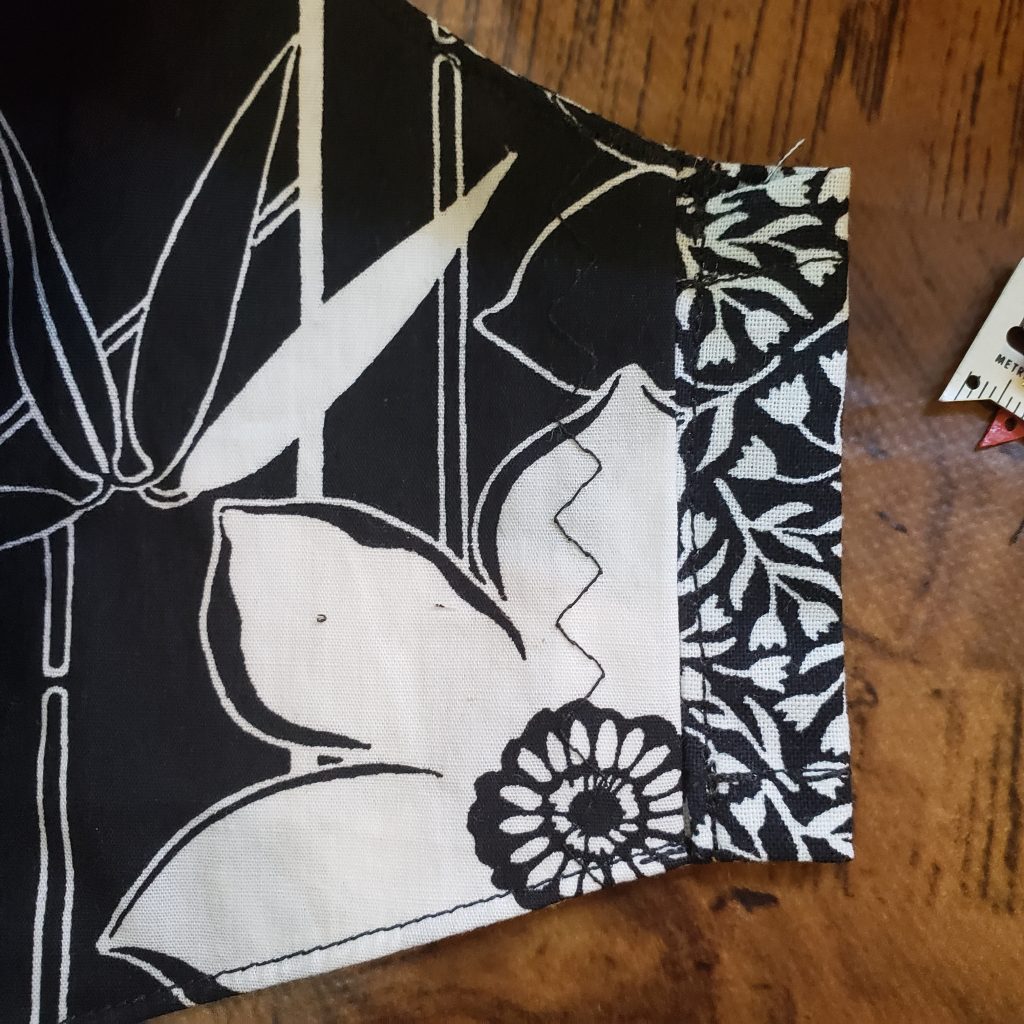
Now it’s time to thread the elastic! Start at the bottom of the mask, and thread the elastic up through the first sleeve, then down from the top of the second. You’ll have two tails of elastic on the bottom side of the mask. Add a slide or tie a simple knot here to tighten the straps around the back of the head.
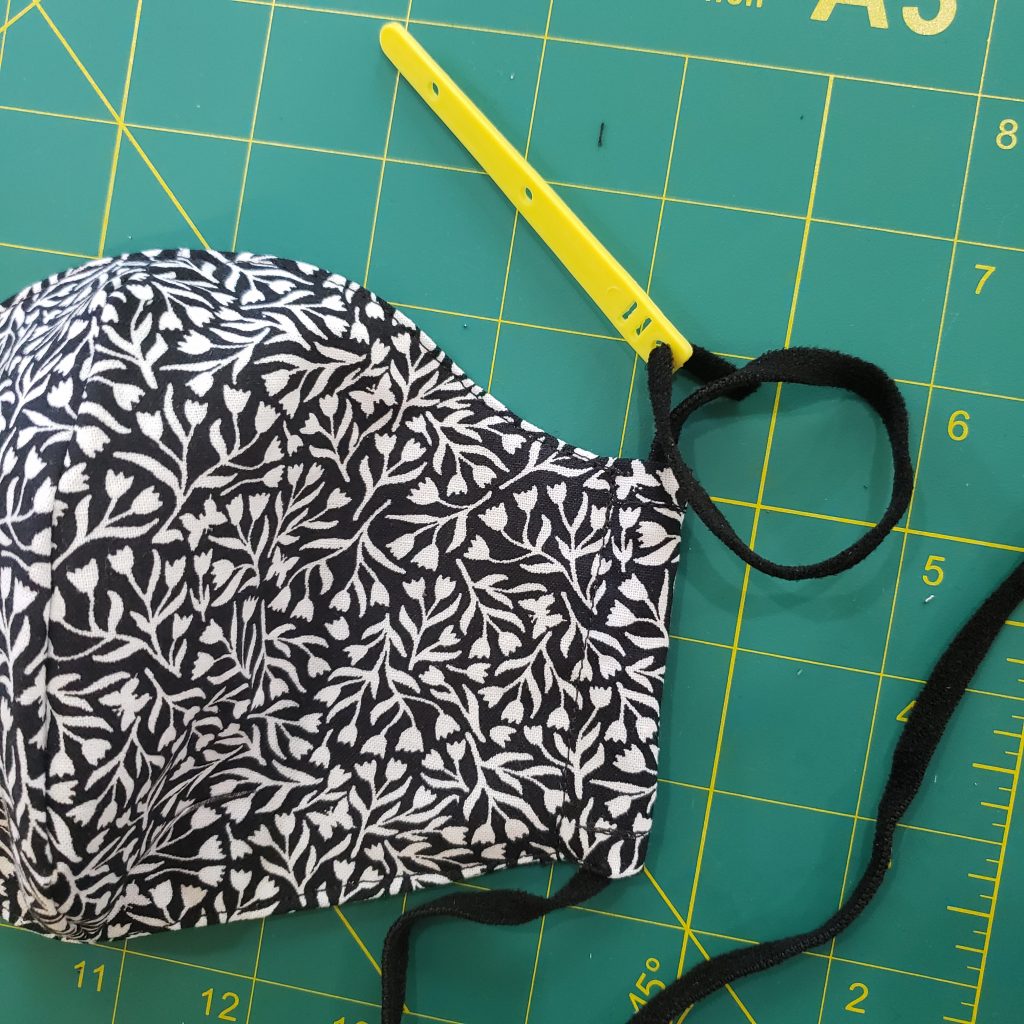
iF YOU PREFER EAR LOOPS: (we are a house divided, half of us will ONLY wear ear loops and half of us will NEVER wear ear loops.) Cut the elastic in half, and thread one piece through each side. Knot the elastic to make a loop on each side, and then trim the ends. (Make this the size that is comfortable for you, but if you have to guess try and leave 6″ for kids and 7″ for adults outside the sleeve.) Pull the loop around until the knot is inside the elastic sleeve and you only see smooth elastic on the outside.
Congratulations! You are done. Remember to put in a fresh filter each time you wear the mask, and when things get back to “normal,” whatever that may be, come back and hit me up for swimming or aquatic fitness.